This will take you to the themes area of your Ghost admin panel.
3. Upload Your Theme
Click the Upload a Theme button.
An upload window will appear.
Find the theme ZIP file (for example, sinju.zip) in your downloaded package.
Drag and drop the ZIP file into the upload area, or click to browse and select it.
4. Activate the Theme
Once the upload is complete, click the Activate Now button.
Your new theme is now live on your site!
That’s it! Your Ghost site should now be using the new theme. If you have any issues, double-check that you uploaded the correct ZIP file and that the upload finished successfully.
Loading content...
Loading content...
Loading content...
Loading content...
Table of Contents
Select an article to see its table of contents
Quick Navigation
Documentation Generated by: ThemeixDate: May 01, 2026
Create a Ghost Content Key
How to Create a Ghost Content API Key
To use this theme and connect your site to Ghost’s Content API, you need to generate a Content API Key from your Ghost admin panel. This key allows your website or theme to securely fetch content from your Ghost blog.
Follow these steps to create your Content API Key:
1. Open the Integrations Section
Log in to your Ghost Admin Dashboard.
In the left sidebar, click on Integrations. This is where you manage connections between Ghost and external services or custom themes.
2. Add a Custom Integration
Click the Add custom integration button.
3. Name Your Integration
Enter a name for your new integration. You can use any name that helps you remember what it’s for (e.g., “My Theme Content Key”).
Click Create to proceed.
4. Copy Your Content API Key
After creating the integration, Ghost will display several keys. Look for the Content API Key.
Hover over the key and click the copy icon to copy it to your clipboard.
Tip: Keep this key safe. You’ll need it to connect your theme or site to your Ghost content.
Featured Post Option
Ghost CMS provides a Featured Post option that allows you to highlight specific content on your site. In themes that support this functionality (including ours), featured posts are displayed prominently on the frontend.
How Featured Posts Work
If you have more than one featured post, they will automatically be displayed on the theme. This is a great way to draw attention to important content, such as announcements, popular articles, or cornerstone content.
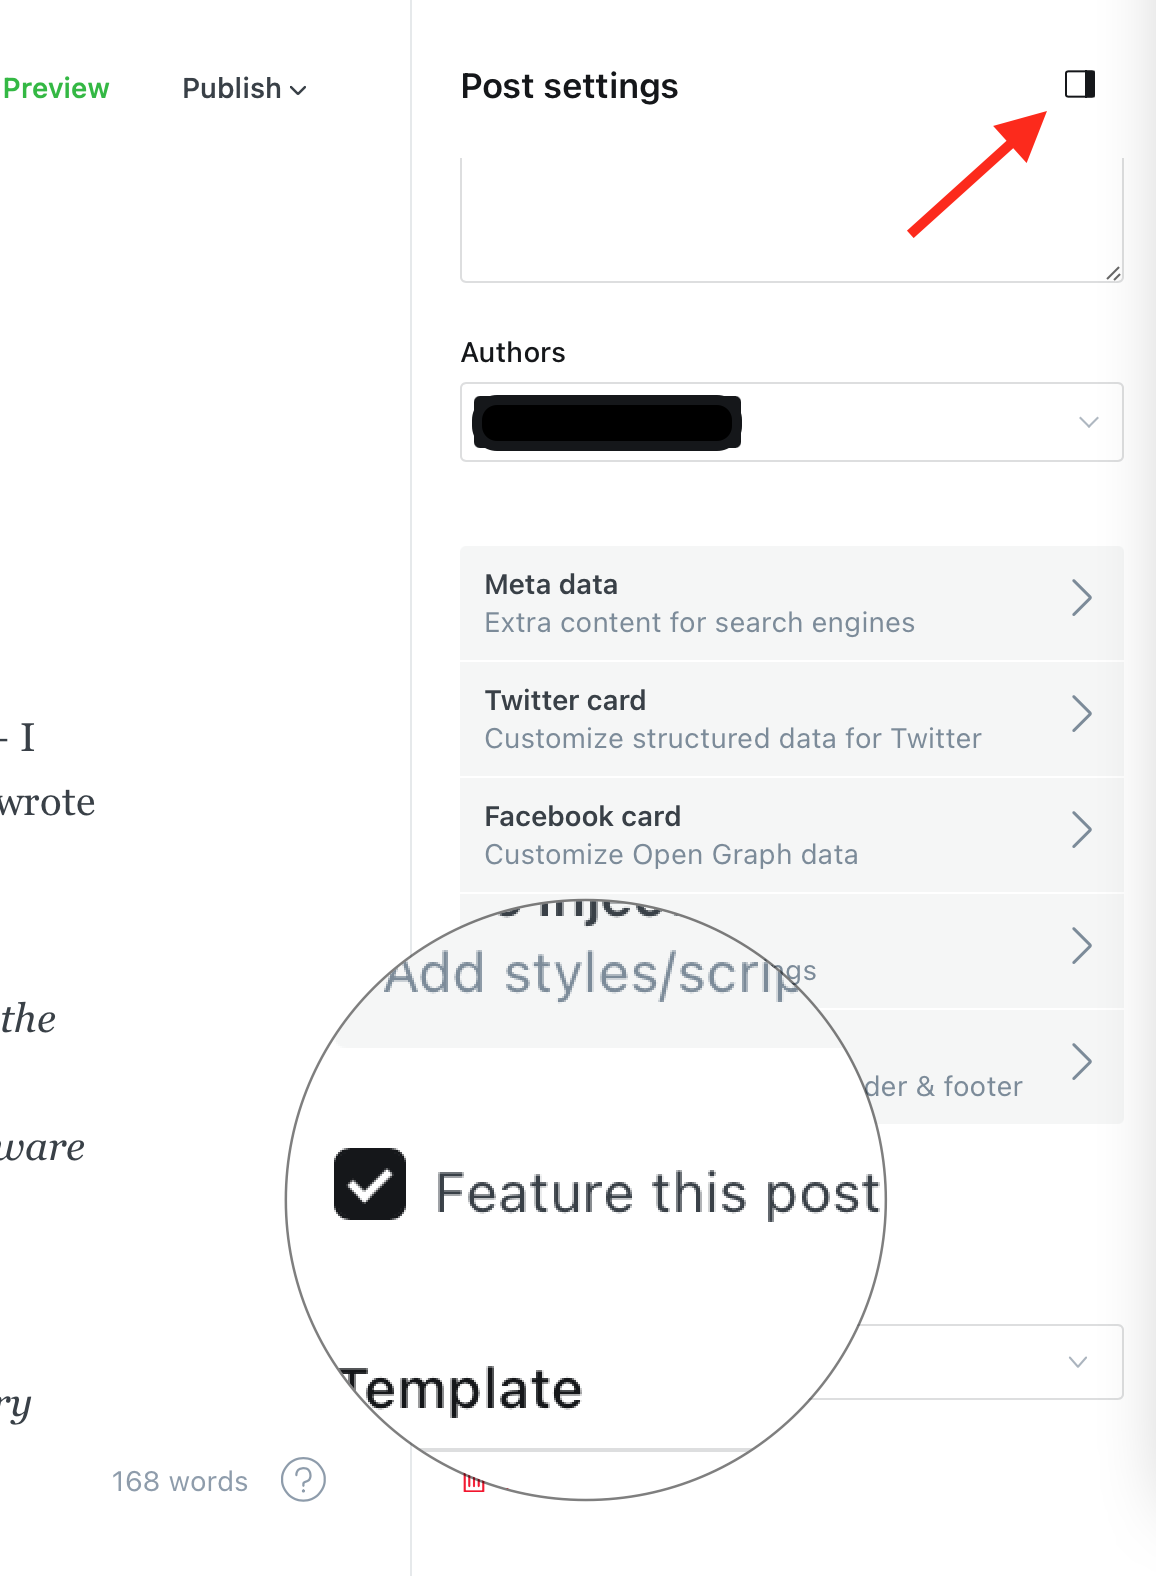
How to Mark a Post as Featured
To mark a post as featured:
Open the post you want to feature in the Ghost Admin Panel.
Click the Post Settings gear icon in the top right corner.
Enable the “Feature this post” option by checking the box.
Once a post is marked as featured:
It will appear in the featured section of your site’s homepage or designated area (depending on your theme).
Styling and Customization
Since featured posts receive the feature class, you can target them specifically in your CSS for custom designs — such as different backgrounds, font styles, or animations.
Using featured posts effectively can help improve engagement and guide your readers to the most important content on your website. Be sure to keep the section updated with fresh or strategic posts to make the most of this feature.
Create Tags Page
Ghost CMS allows you to create custom pages using templates, including one that can automatically display all your tags. This is useful for organizing your content and helping visitors explore topics on your site.
Steps to Create a Tags Page
Follow the steps below to create a dedicated Tags page:
Log in to your Ghost Admin Dashboard.
Navigate to the Pages section.
Click the “New Page” button to create a new page.
Name the page something like “Tags” or “Explore Tags” - whatever fits your site’s style but make sure page slug/permalink is tags.
How it works
After assigning the tags page:
The page will automatically display all available tags on your site.
Each tag will typically be linked to its own archive page, allowing users to browse content by tag.
The layout and style of the tags page will depend on how the tags.hbs template is defined in your theme.
By using this method, you can easily create a dynamic Tags page that updates automatically as you add new tags to your content.
Contact Page
Creating a functional and visually appealing Contact page in Ghost is simple. Follow the steps below to get started:
Step 1: Create the Contact Page
Log in to your Ghost Admin Dashboard.
Navigate to the Pages section and create a new page titled Contact.
Add your desired content using the Ghost editor. This can include a short message, contact instructions, or location information.
Step 2: Add a Contact Form
To make your Contact page functional, you can integrate a form. Below are three recommended tools to easily add a contact form to your Ghost site:
You can customize the appearance of your form by adding inline styles or editing your theme’s CSS. Here’s a quick example for custom button and element colors: